A driveway ramp can make daily life easier in ways you may not expect. It helps cars move smoothly, keeps tires safe, and makes walking or rolling easier too. This guide shows you how to install a driveway ramp step by step, using simple tools and clear actions. By the end, you will know what to plan, what to build, and how to keep it strong for years.
Why a Driveway Ramp Matters More Than You Think
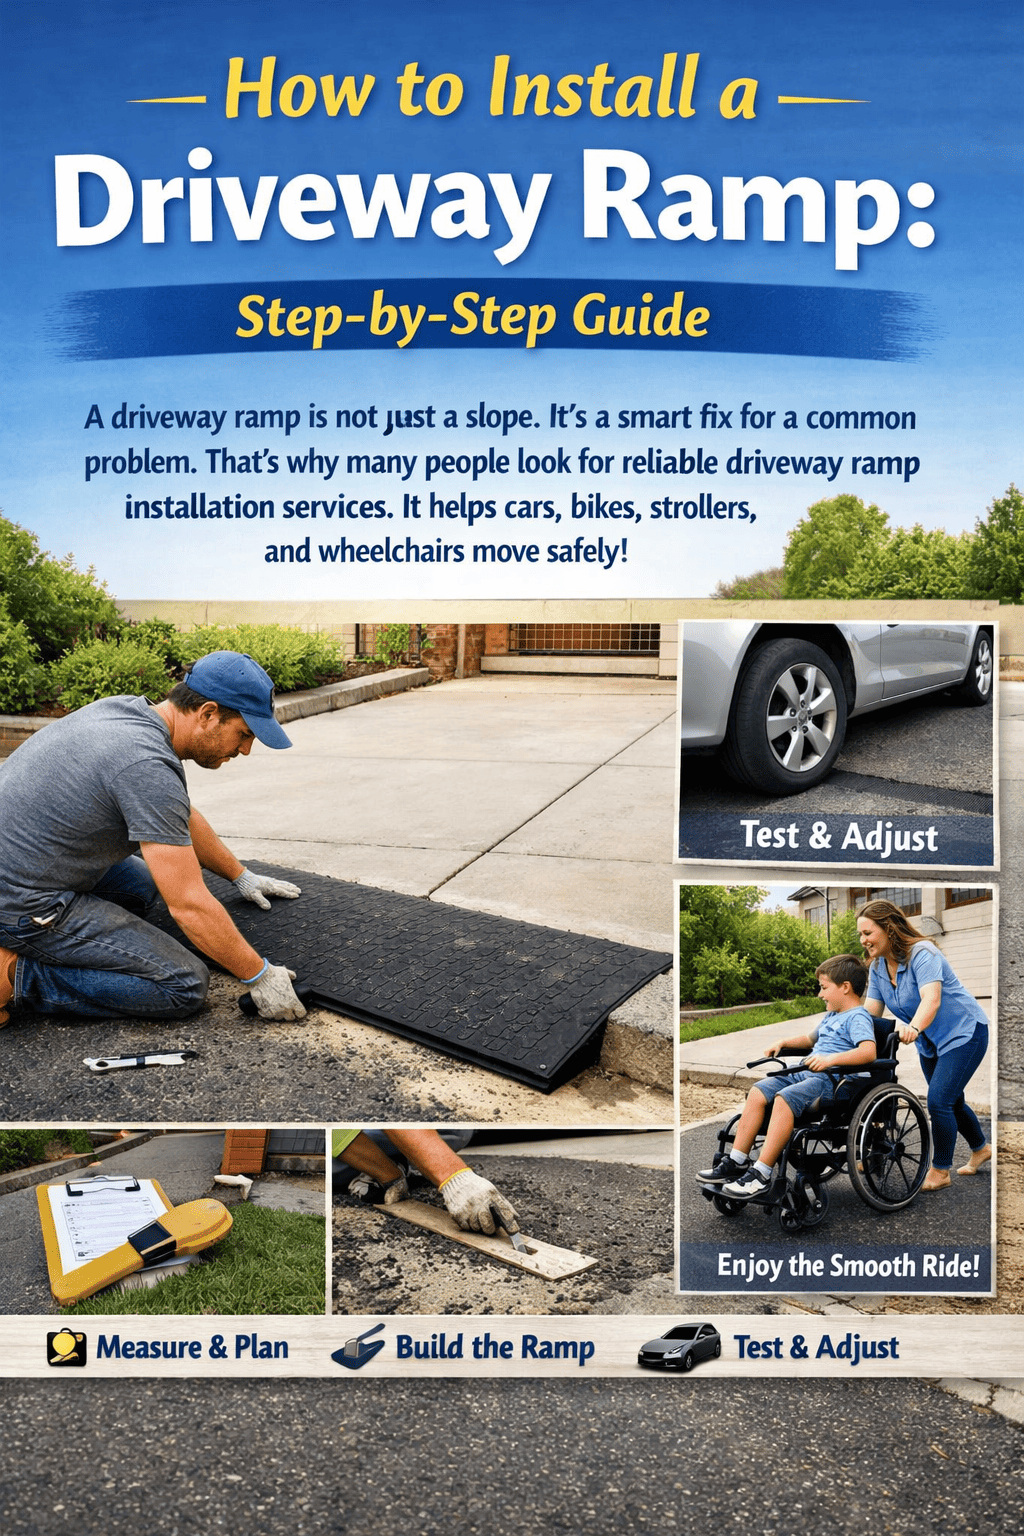
A driveway ramp is not just a slope. It is a smart fix for a common problem. High curbs and steep edges can scrape cars and cause trips, which is why many people look for reliable driveway ramp installation services. A good ramp removes that risk and creates a smooth path. It also helps kids, bikes, strollers, and wheelchairs move safely. Once you see how much smoother life becomes, you will wonder why you waited.
Check Your Driveway Before You Start
Before building anything, take a close look at your driveway. Notice the height of the curb and the space you have. This step saves time and avoids mistakes later. A ramp that fits well will last longer and work better. Measuring first is the key to a clean and safe result.
Measure the Height and Width Carefully
Grab a tape measure and write things down. Measure the curb height from the road to the driveway. Then measure the width of the space where the ramp will sit. These numbers guide every step after this. A good ramp should be wide enough for tires and long enough for a smooth rise.
Choose the Right Ramp Material
Materials matter more than most people think. Rubber ramps are quick and easy. Concrete ramps are strong and long-lasting. Asphalt ramps blend well with most driveways. Wood ramps are low cost but wear faster. Pick a material that matches your weather, budget, and driveway style.
Understand the Slope for Safety
A ramp should never feel steep. A gentle slope keeps cars safe and avoids damage. The best rule is simple: longer is better. A longer ramp spreads the height change over more space. This makes driving smoother and walking safer. A good slope feels natural, not forced.
Clean the Area Before Installation
Dirt and dust weaken ramps. Sweep the driveway edge and curb area well. Remove loose gravel and mud. If the surface is clean, the ramp will grip better and stay in place longer. This small step makes a big difference later.
Mark the Ramp Area Clearly
Use chalk or tape to mark where the ramp will go. This helps you see the final shape before building. It also helps keep the ramp straight. A clear outline reduces errors and saves time. Think of it as a dress rehearsal before the real work.
Installing a Rubber Driveway Ramp
Rubber ramps are the easiest to install. Place the ramp against the curb. Make sure it sits flat. Some ramps use bolts or adhesive to stay in place. Follow the maker’s steps closely. Once done, test it slowly with your car to be sure it does not move.
Installing a Concrete Driveway Ramp
Concrete ramps take more effort but last longer. Mix the concrete as directed. Pour it into the marked area. Shape the slope using a flat board. Keep the surface smooth. Let it cure fully before use. This wait is worth it for strength and safety.
Installing an Asphalt Driveway Ramp
Asphalt ramps blend well with asphalt driveways. Heat the asphalt mix if needed. Spread it evenly in layers. Press and smooth it to form a gentle slope. Compact it firmly. Let it cool before driving over it. Done right, it looks like part of the driveway.
When to Consider Professional Help
Some ramps need skill and tools. Large height gaps or city rules can complicate things. This is where driveway ramp installation services can help. Professionals handle permits, slope rules, and long-term strength. It can save time and prevent costly fixes later.
Check Drainage After Installation
Water should flow away from the ramp, not pool around it. Watch how rain moves after install. Poor drainage can weaken the ramp over time. If needed, adjust the edges to guide water away. A dry ramp lasts longer and stays safer.
Test the Ramp Slowly and Safely
Do not rush this step. Drive slowly over the ramp the first few times. Listen for scraping or movement. Walk across it too. If it feels solid and smooth, you did it right. Testing builds confidence and catches small issues early.
Common Mistakes to Avoid
Avoid making the ramp too short. Avoid skipping surface cleaning. Do not rush curing time. These mistakes shorten ramp life. Taking your time now saves money later. A good ramp is about patience, not speed.
How to Maintain Your Driveway Ramp
Check the ramp every few months. Look for cracks, shifts, or loose edges. Clean off dirt and leaves. Small care steps keep it strong. A little attention helps the ramp last for years without trouble.
Weather and Seasonal Care Tips
Cold can cause cracks. Heat can soften some materials. In winter, avoid sharp tools when clearing snow. In summer, check for soft spots. Knowing how weather affects your ramp helps you protect it year-round.
Why a Well-Built Ramp Adds Value
A smooth driveway entrance feels good every day. It protects cars and makes access easy for everyone. It also adds curb appeal. A well-built ramp shows care and planning. That value shows every time you pull in.
Final Thoughts
Installing a driveway ramp is a smart upgrade. With the right steps, it is safe and simple. Measure well, choose good materials, and take your time. Whether you build it yourself or get help, a good ramp makes daily life smoother.
For professional support and long-lasting results, many homeowners trust Asphalt WorkX for quality asphalt solutions. Learn more at https://asphaltworkx.ca.
FAQs
How long does it take to install a driveway ramp?
Most rubber ramps take less than one hour. Concrete or asphalt ramps may take one to two days including curing time.
Do driveway ramps damage cars?
No. A properly sloped ramp protects cars by preventing scraping and sudden bumps.
Can I remove a driveway ramp later?
Yes. Rubber ramps are easy to remove. Concrete and asphalt ramps are permanent but can be removed with tools.


Leave a Reply